
Templates are ready-made surveys you can copy into a brand-new survey in one click — so you don't have to start from a blank page every time. Pick a template, give your survey a name, and you land in the builder with all the sections and questions already in place, ready to tweak.
How templates work#
A template is a snapshot. When you create a survey from one, Intuify makes a fresh copy of it into your new survey. From that moment on, the two are completely independent:
- Editing your new survey never changes the template.
- If the template is later updated, your already-created survey stays exactly as it was.
So you can safely use a template as a starting point and reshape it however you like.
A template holds everything a survey holds, not just its questions — so a template built with skip logic, quotas, flow blocks, panels, embedded data or custom settings and styling hands all of that to every survey made from it.
Two things are deliberately left behind, because they belong to a survey rather than to a template: the plugin build a survey is pinned to, and anything operational (responses, distributions, quota counts, publish state).
Creating a survey from a template#
- On the Surveys page, click Create New Survey.
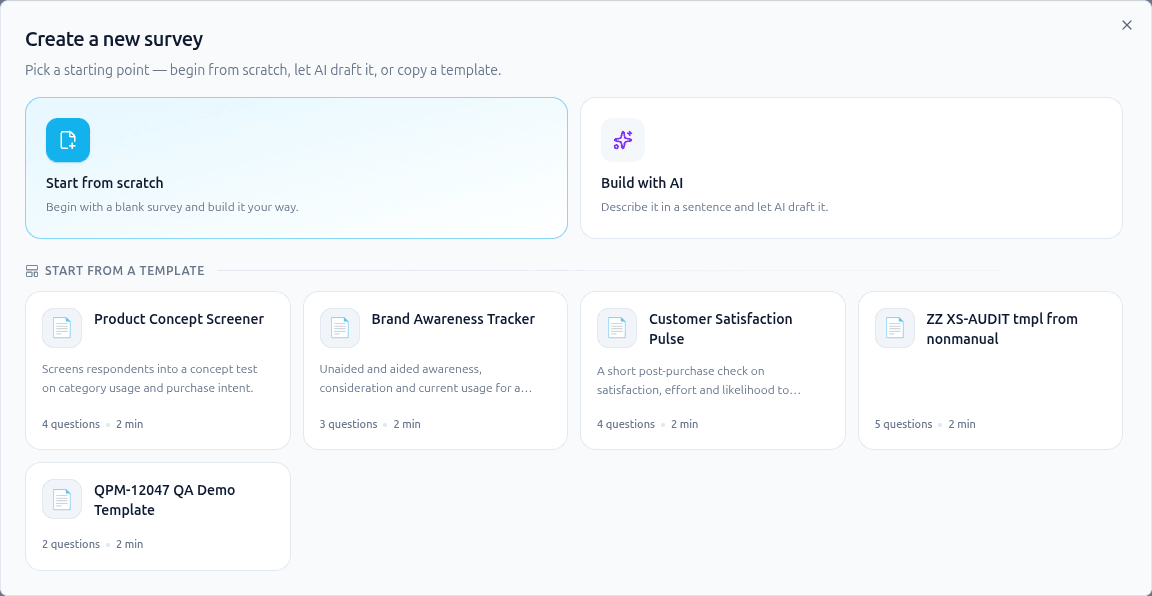
- The Create a new survey dialog opens with three ways to start:
- Create survey from scratch — a blank survey you build yourself.
- Build with AI — describe what you want and let AI draft it.
- Pick a template — the cards below.
- Browse the template cards. Each card shows the template's icon, name, a short description, and how many questions it has (plus a rough time-to-complete).
- Click a template to select it.
- Give your new survey a name (it defaults to the template's name — change it to whatever you like) and click Create survey.
- You're dropped into the builder on your new survey, ready to edit.
Tip: Use the Back to templates button if you change your mind before creating — it returns you to the grid without creating anything.
Saving a survey as a template#
Admin only. Creating, editing and deleting templates is restricted to Intuify platform admins. If you don't see Save as Template on the survey menu, your account doesn't have that access — and that's expected. Using a template to create a survey is open to everyone who can create surveys.
Built a survey worth reusing? Save it as a template so teams can spin up copies later.
- Open the survey in the builder.
- From the survey menu, choose Save as Template.
- Fill in the template details:
- Template name — defaults to the survey's title.
- Description (optional) — a short note on when to use it.
- Icon (optional) — upload an SVG (up to 20 KB). A line-art outline is automatically recolored to match the theme; an icon with its own colors or a gradient is shown as uploaded. If you skip it, a default icon is used.
- Tags (optional) — short keywords like
csat,screener, orquarterlyto help teammates find it later.
- Click Save to Library. Your template now appears in the Library and — depending on its visibility — in the Create dialog.
The dialog also shows how many sections and questions the template will contain, so you can confirm you're saving the right thing.
Managing the template catalogue (Intuify admins)#
This section is for Intuify platform admins. If you don't see the edit and delete actions on a template card, your account doesn't have admin access — and that's expected.
Admins curate the shared template catalogue from Library → Templates. Every template is a card there, and the card's ⋯ menu holds the management actions.
Visibility#
Every template has a visibility setting that decides who can use it:
| Visibility | Who sees it |
|---|---|
| Core Intuify | Everyone — visible to all clients. |
| Specific clients | Only the clients on the template's list. |
| Hidden | Nobody but admins — kept in the catalogue but not offered to anyone. |
Note: visibility is a stored property of each template, but there is currently no screen for changing it — the admin management page that used to own that control has been removed. New templates are created Hidden. Ask engineering if a template needs its visibility changed.
Icons#
Give a template a distinctive look by uploading an SVG icon (up to 20 KB) when you save a survey as a template. A line-art outline is recolored to fit the theme; an icon with its own colors or a gradient is shown exactly as uploaded instead. If you skip it, a default icon is used.
Editing a template's content#
Changing a template's content — its sections, questions, logic, quotas, panels, translations and settings — is a separate action from editing its catalogue details. Choose Edit content from the template card's ⋯ menu and it opens in the survey builder.
It is the same builder you edit a survey with, with the same tabs:
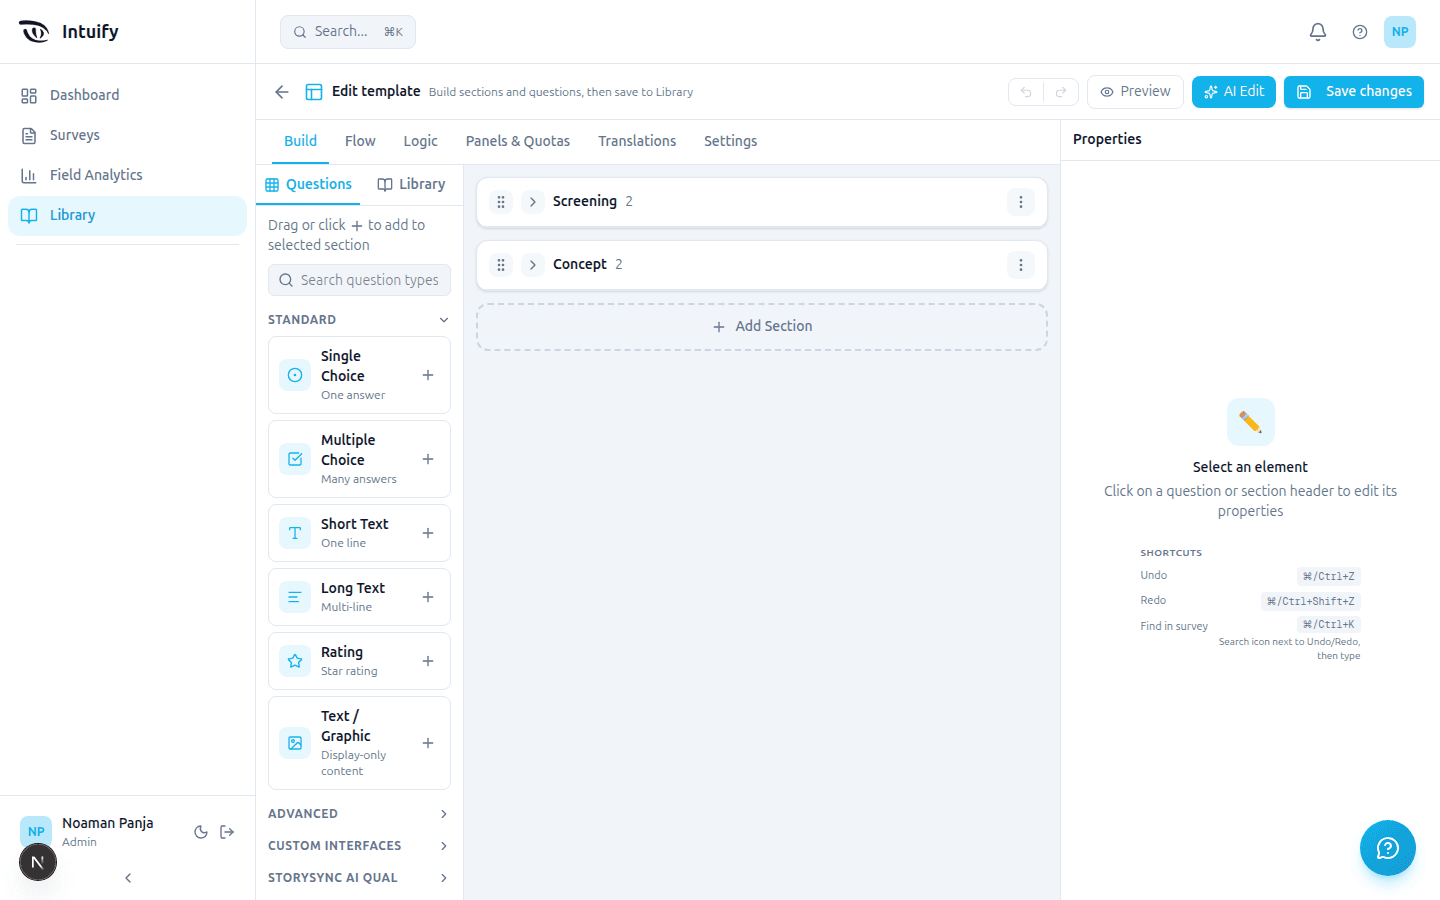
Everything you change here is stored on the template and handed to every survey created from it afterwards. Surveys already created from it are untouched.
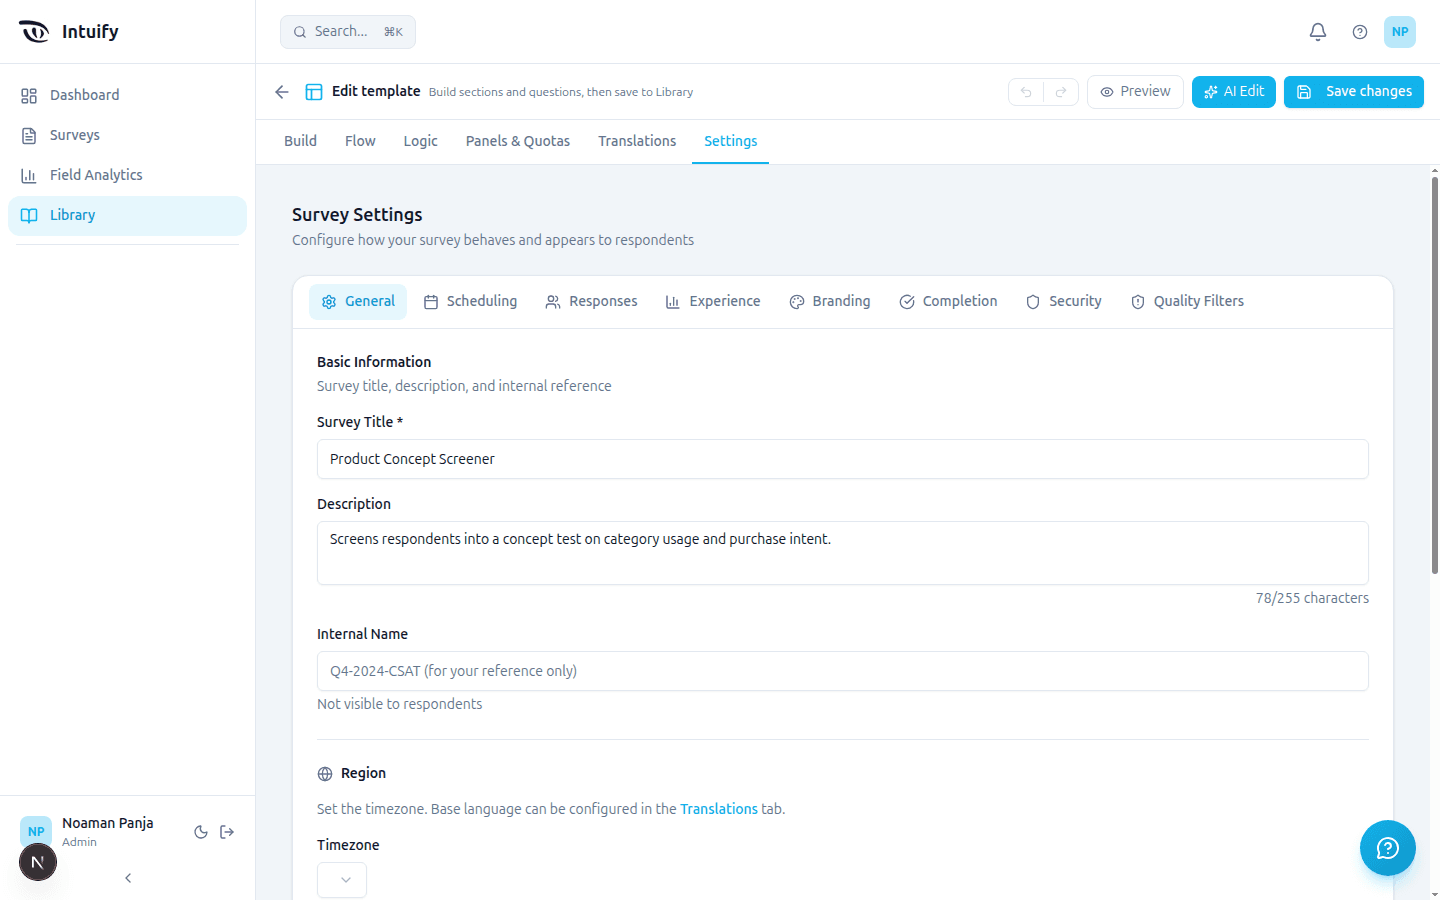
There is no Distribute tab, and that is deliberate: a template has no live link, no responses and nothing to send. Click Save changes when you're done — template edits are not auto-saved.
Editing details and removing#
- Edit details changes a template's name, description and tags.
- Delete removes a template from the catalogue. This can't be undone, and existing surveys created from it are unaffected.
- Use the search box and the tag filters above the grid to narrow a long list.
Related guides#
Was this page helpful?